If you do not correctly optimize an image you upload to your website, your site speed will also drop significantly, causing Google and other search engines to break your SEO score and fall back in searches. This will be a severe problem for you if you get most of your visitors from search engines.
Today, I will tell you what you need to pay attention to when adding images to your WordPress sites and how to make the necessary visual optimizations. If you follow the steps I will tell you one by one, you will significantly increase your website opening speed, allowing you to improve your ranking in Google searches.
Test your website speed
When you test with the Google Page Speed test tool or GT Metrix website speed test tool, you will probably see that the image size is too large and you need to optimize. You can run this test using any of the links below.
Google Page Speed: google.com/speed/pagespeed/insights
GT Metrix: gtmetrix.com
You may also like;
Resize your images
Resizing these images is a bit complicated. For example, there is a banner area on your website, and the visual size of this banner area is 300px — 300px. Setting this image to 1000px — 1000px will improve the file size, and the place where that image is displayed will open faster and contribute to your page speed score.
In another example, right-click on your image in the “Featured Image” field on your website to access the image information and add an idea of the size your theme uses. This way, the system does not undergo an extra burden of resizing.
Usually, boutique sites upload the images they take from their mobile phones or with the camera directly to their sites. Considering that the size of a photo taken with a camera is at least 4000px, this will take up at least 3–4MB for a single image.
When a user who visits your site tries to see all the images simultaneously, there will be an incredible server-based loading problem, which will cause your site to slow down, or even some hosting-based measures will be taken, and your site will be shut down for a short time.
Instead, it would be more logical to learn the visual size of the areas where you add your products and display your images in that size with Photoshop and similar programs.
Avoid uploading PNG images.
Although the images prepared in PNG format in the photos you upload to your site are more effective in terms of quality, they take up a lot of space in file size. Make sure to use the JPEG format for the images you upload to your site. Even if only the JPEG format is no longer sufficient instead of JPEG format, it will be helpful for you to prepare images in JPEG 2000 format or JPEG XR format.
Image formats such as JPEG 2000, JPEG XR, and WebP generally provide better compression than PNG or JPEG. This ensures faster downloads and less data consumption.
Check more details from here.
Save your images for the web with Photoshop.
Photoshop is known as one of the most popular web and photo tools. It supports both MAC OS and Windows. Make the most successful optimization using the “Save for Web” tab after resizing the images you will upload to your site with Photoshop. You can use the “ctrl + alt + shift + s” keys for the Photoshop web save feature on Windows devices and “cmd + opt + shift + s” on MAC OS devices.
In the window that opens, please select the image format in the right area (JPEG is our recommendation), then adjust the resizing (the most suitable image size for your site).
Use plugins to optimize images
Nobody wants extra costs when using the website. In the first place, hosting, domain name, and SSL come with high costs. Unfortunately, WordPress’s most successful visual optimization plugins are usually paid plugins.
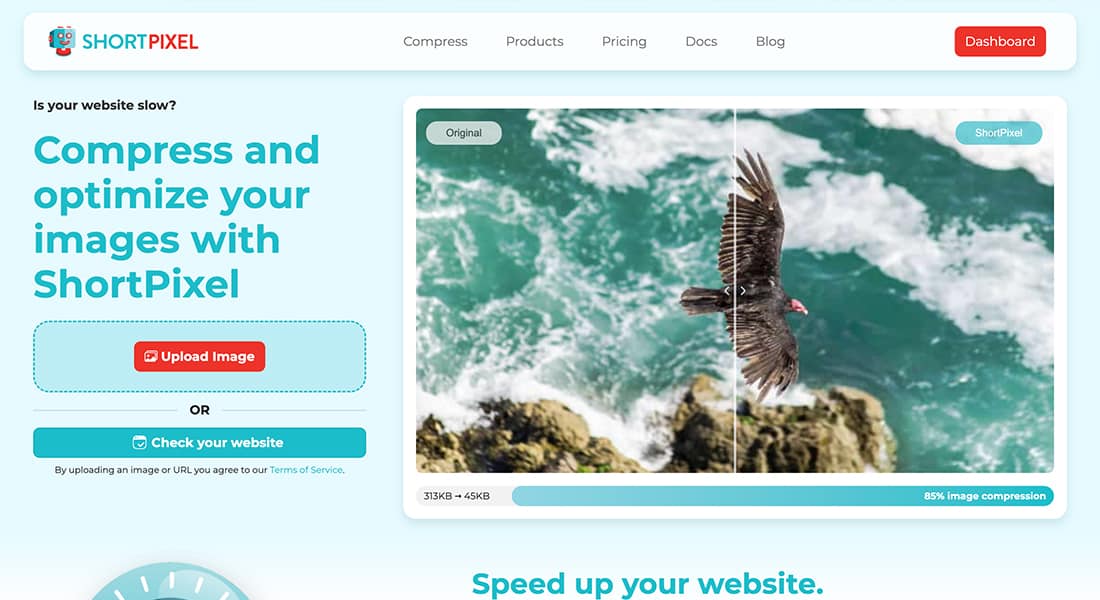
My advice to you is the WordPress Shortpixel plugin. With a monthly fee of only $4.99, optimizing your 10,000 images to the quality you want is possible. The plugin was fees, and visit the imagify.io page for details.
When you visit the website, you can click the “Try for Free” tab in the top menu to optimize the image you want and get a preview before purchasing the plugin.
I hope this article I prepared for you to optimize your WordPress images has helped you. You can send me all the issues you have in mind from the comments section.


