
Are you one of those who say that I am waiting for the right time to open a blog with WordPress and share my articles? Or do you think that opening a blog is a tricky thing? I cannot do it alone; I need to find a web designer. You are wrong! We have shared everything you need to know to build a WordPress website in this blog article.
Visit the post now and create your blog. As someone who has dozens of websites and blogs, I can say that you can straightforwardly create your website without any difficulty. In this article, I will explain in detail “How to Start a WordPress Website” most simply and effectively for new website owners.
All the descriptions and features in this list we have created are specific to 2022, and I will try to prepare a unique guide for you by constantly updating this article we wrote about WordPress setup.
About WordPress Website
WordPress is the world’s most popular content management system. In summary, WordPress-based sites make up a large part of the internet. The majority of this rate consists of blogs and e-commerce sites.
With the word “WordPress” searched on Google 3 million times a month, 20.000.000 websites use the WordPress infrastructure. This does not include WordPress sites installed on a regular host. So what makes WordPress so unique? I want to list a few prominent features in the list below.
- User-friendly and a robust management panel
- Language options for 120 countries
- SEO-friendly link and code structure
- Thousands of themes support
- Thousands of plugins support
- Thousands of developers and designers from all over the world
What is needed to create a WordPress website?
As with any website building, you will need a few requirements to start a website with WordPress. If we need to take a brief look at these requirements, you need; one domain name, a hosting web package, and an optional SSL certificate. Before explaining all this, I would like to tell you that you can open a free-of-charge website with WordPress.
If you do not have a budget that you can allocate for needs such as domain name and hosting, you can open a free blog using the WordPress infrastructure. For this situation, visit WordPress.com. If you ask what the difference between WordPress.com and WordPress.org is;
- You install the files you download from WordPress.org to your hosting package, and you will have complete control.
- If you set up a blog on WordPress.com, a lot of space on your site will be limited, and WordPress ads will be displayed in many areas.
- If you don’t pay for any subscription plan, you can not integrate your domain name; you will have a site address as yourblog.wordpress.com.
All the steps I will explain in this article will be self-host, which means the website installation is prepared with WordPress.org infrastructure, which you can install on your hosting web package and use your domain name.
1. What is Domain?
The domain is the address of your website. Its annual fee is $10 as of September 2022. You have to renew your domain name every following year. I won’t name any company here. You can find out where you can buy the domain name by researching the Internet.
2. What is Hosting?
Web hosting is a repository where you host all the files of your website and database (content, user information, setup files, etc.). It will be sufficient to take advantage of the WordPress hosting service offered specifically for WordPress or a hosting package based on Linux.
As of September 2022, the 1-year web hosting fee varies between $10 and $25. This price difference is related to the difference in the service offered.
3. What is an SSL Certificate?
SSL is a security protocol that encrypts data transfer transactions made over internet pages and enables them to be transmitted to the opposite server. Websites with SSL certificates are displayed as “HTTPS” in the browser bar. Google has mentioned that websites that do not have an SSL certificate will decrease in rankings after its latest update.
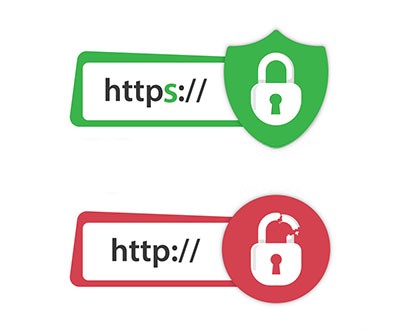
Therefore, you must have an SSL certificate on your website to reach more customers and readers by rising on Google. As of September 2022, the annual SSL fee is $10. This price may vary depending on the campaigns offered by the companies.
Step-by-Step WordPress Setup
Step 1 — Technical Adjustments
The first thing you need to do is to buy web hosting. For this, you can benefit from comparison sites by doing good research. We recommend you Cloudways!
The web hosting that you buy supports WordPress. Do not buy Windows-based hosting. You will need a web hosting package with Linux infrastructure.
If you start a personal blog, the “Single WordPress” package will be enough for you. You will often see phrases such as CPU and RAM in boxes. For a start, 1 CPU and 2 RAM will be sufficient. This package will be enough for blogs in the beginning stage.
If we have chosen the web hosting package that suits our budget, we can move on to the second step; after clicking the buy button, let’s search for the domain name we want for our blog by typing it in the search box.
If you saw the “Can register this domain name” option, this domain name is available for registration, and continue the process by clicking the Save and Use button.
You may also like;
You have to choose the payment cycle on the next screen. You can purchase the domain name and hosting package for one year or two. Let’s switch to the payment area, the last step, by clicking the complete order button.
After viewing your shopping cart, click the “Continue“ button and create a new account if you do not have an account.
Make your web hosting and domain payments by clicking the “Pay the Document Now” tab on the invoice information screen.
After we have made all our adjustments, we can proceed with our first WordPress website setup. From now on, we will do the operations through CPANEL. After clicking the management button, click the Connect to CPANEL button from the window that opens, and let’s switch to the CPANEL area.
Step 2 — WordPress Website Installation
We will follow the simplest method to install WordPress. There are several different methods for installation, but we will do it from the “Softaculous Apps Installer” area, which is the simplest method for beginners. After logging in to CPANEL, let’s go to the bottom of the page and click on WordPress from the Softaculous Apps Installer tab.
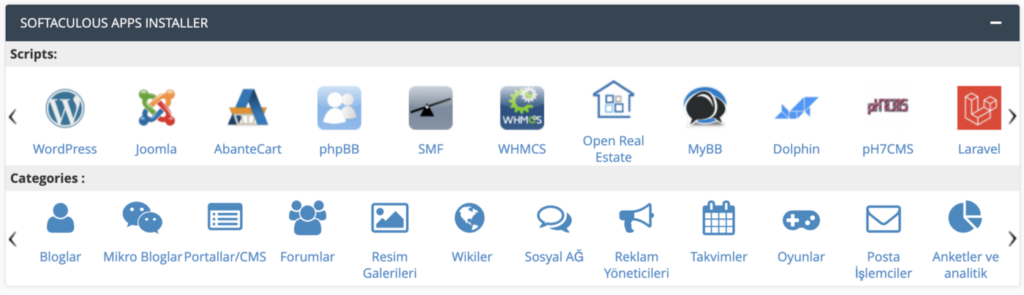
In the window that opens, you will see some information about the WordPress installation; click the “Install Now” button in the area that interests you.
- Select Protocol: You need to select your site’s HTTP protocol from this field. Since there is no SSL certificate, let’s choose the HTTP:// field in this area.
- Select Domain: Select the domain name we purchased with hosting in this area.
- Installation directory: Please leave this field blank if there is no installation to a subfolder (myblog.com/blog) in this field.
- Site Name: Enter the name of your blog here. Example: “My Blog”
- Site Description: Here, you can add a slogan describing your site. For example, if your site is a blog where you will share poems: “The newest address for poetry lovers ..”.
- Enable Multisite (WPMU): Do not click here.
- Admin Username: Enter a username here that you will never forget. Example: Admin
- Admin Password: Enter a password that cannot be easily guessed here and make sure to save this password aside.
- Admin Email: Enter your e-mail address here to be used in some areas of your blog (password reminder, comment confirmation, etc.).
- Select Language: Select your language as the default language.
- Limit Login Attempts (Loginizer): Click this field; this is a plugin that will provide your site extra security.
Click the “Install” button and wait for the installation to finish without making any editing in the other fields. After the installation, you will see the address of your site management panel and your login information; please save this information. You will need this information later when logging into your administration panel.
Step 3 — Select a WordPress Blog Theme
Congratulations, you’ve created your first blog. Now it’s time to choose a lovely template for your blog. Enter your site’s administration panel by typing the link of yoursiteaddress.com/wp-admin in the browser field.
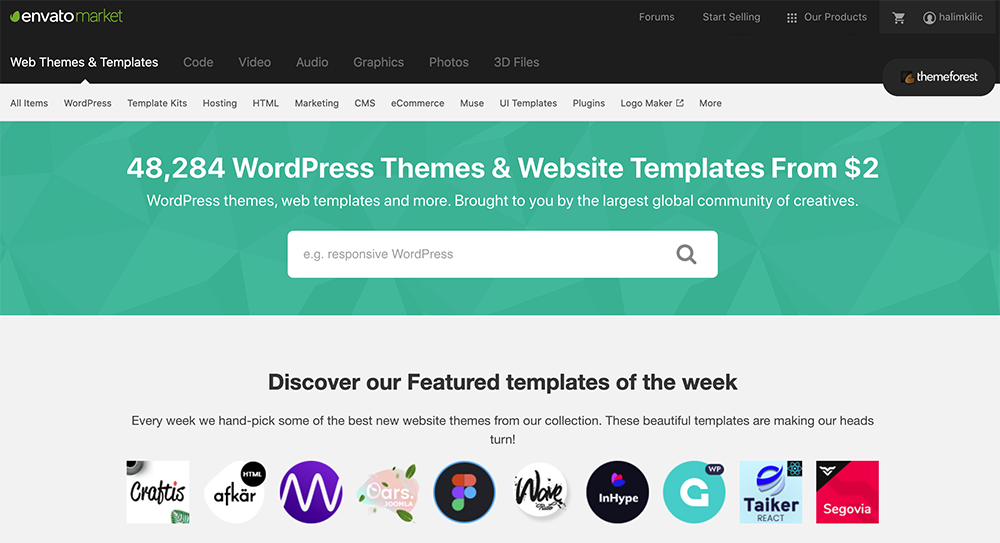
The area you will face is the management panel of your blog. In the following steps, I will explain in detail which areas are what they do. By the way, ThemeForest will be a valuable resource for you if you want to use a paid WordPress theme.
You have two options to choose the most beautiful template that reflects your website.
In the first option, you can use free WordPress themes; in the second option, you can start a website by choosing one of the templates that WordPress theme designers have prepared for you.
This article will go on the second option, free templates.
After logging into the WordPress management panel, click the View > Themes tab on the left menu. Here you will see three themes that appear; these are sample templates offered to you while installing WordPress.
To choose a new article, press the Add New button from above, and then you can install any of the hundreds of themes you see on the screen by clicking the Install button.
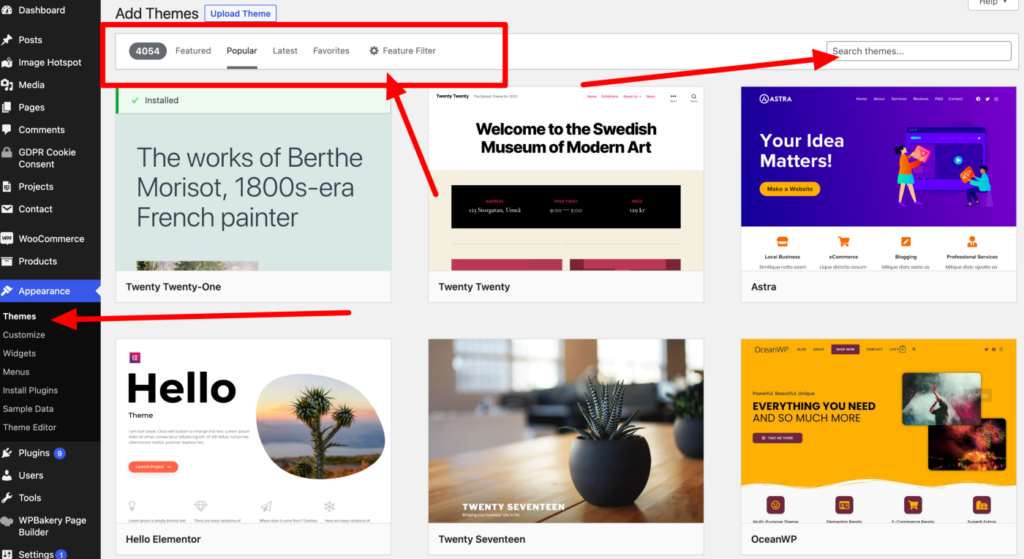
All of the above themes are free, and you can install and delete them as you wish; there is no download limitation. Free articles have the disadvantage that theme owners do not provide you with any documentation or help with installation. Therefore, I advise beginner bloggers to choose simple and easy-to-use themes rather than very complex ones.
Choosing a WordPress theme is difficult; I know you will spend a lot of time in this step. My advice to you will be that you do not rush to choose a theme.
Step 4 — Let’s Prepare Our First WordPress Post
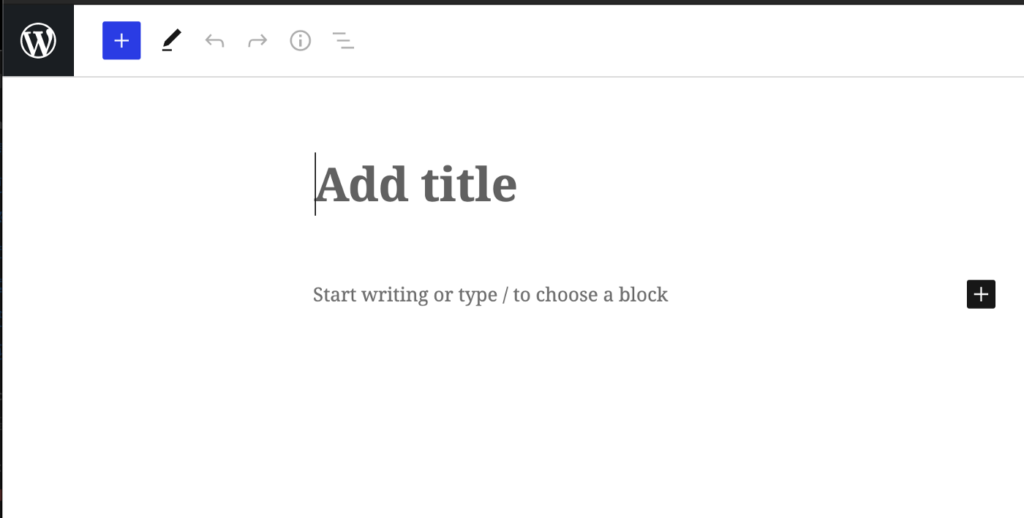
Writing and sharing blog posts with WordPress is relatively simple compared to other blogging platforms. After logging into your WordPress dashboard, you must visit the Posts > Add New area. You will see all the fields related to the article you write.
Before writing a new post, I recommend that you divide the posts you will share on your blog into specific categories. First of all, after you have created all the classes, you will share them on your site in your mind; visit the Articles > Categories tab and add all your categories here.
For example, if your blog is about recipes, your categories may be as follows; Turkish Food, Hot Appetizers, Cold Appetizers, Vegetarian Menu, etc.
You will not have any difficulties because you are the editor and will write your blog posts in your language. But if you still haven’t figured out what to do from here, please let me know in the comments.
After adding the title, content, category, tag, and featured image, share your first post by clicking the Publish button.
Step 5 — Getting to Know the WordPress Page Structure
WordPress works in a specific hierarchical order. In summary, Posts, Pages, Comments, Views, Users, Settings, etc. Accordingly, the second most important area on your website is WordPress pages. Let’s take a brief look at the most important pages that should be on your website;
About: On this page, you can write about what this blog is and what is posted on this blog. They will get to know you better and understand why people should read your articles.
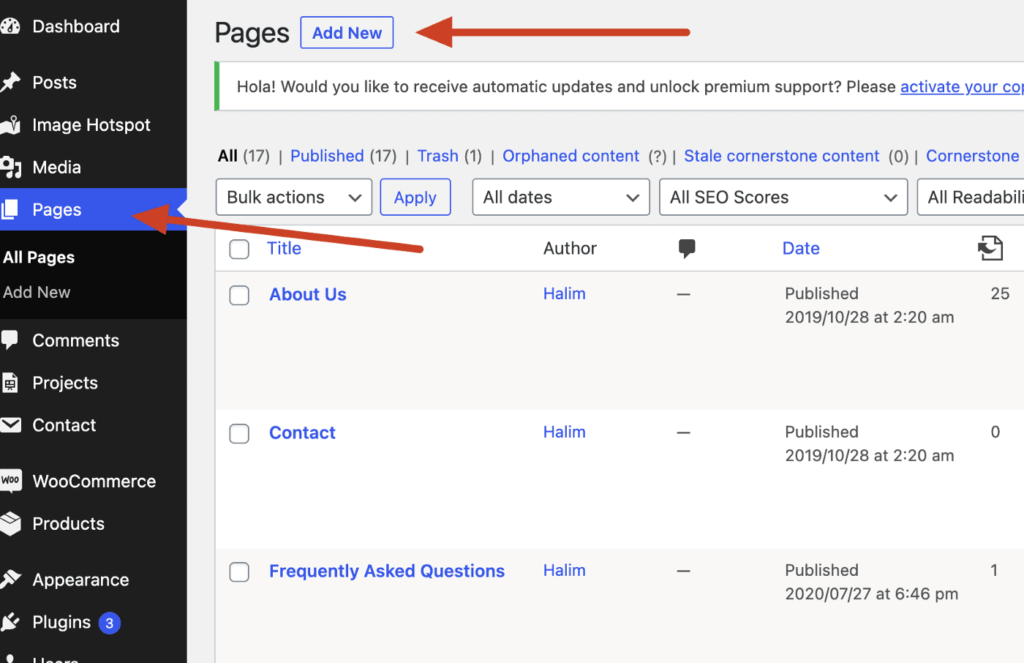
Contact: One of the indispensable pages of a website is the contact page. On this page, there must be a contact form and an e-mail address where your customers can reach you, and if possible, a telephone or WhatsApp number should be added.
Privacy Policy: This page is a new feature that came with the latest update of WordPress. You can learn in detail how your website’s privacy page should be from the Settings> Privacy tab.
These pages are usually prepared once and are not updated for a long time. So, share as much detail as possible while designing these pages because these are the only channels on your website where Google and your readers can recognize and communicate with you.
Step 6 — WordPress Website Plugins and Customization
Plugins: The plugin area is the lifeblood of WordPress. The easiest and first way to further improve your WordPress site is to add some plugins to your site. WordPress plugins are divided into two parts, paid and free. Installing a plugin for WordPress is a straightforward process.
After logging into your WordPress dashboard, click on the Plugins > Add New tab and type what kind of plugin you’re looking for in the search box. Then install and activate the plugin, and that’s all.
So, when you set up a new blog, let’s explain step by step what the essential WordPress plugins are and which plugins you need to install:
Yoast SEO is our 1st most essential plugin that allows your website to be optimized for Google and other search engines.
WP Backup: Makes regular WordPress blog backups and allows you to download and restore from a specific folder. With this plugin, your website will be safe from hacking situations.
WP-Optimize: This allows you to optimize your WordPress Blog infrastructure and database space. It will be helpful to run it once a month.
WP-Google Analytics Dashboard: This plugin allows tracking your website visitors and creating your website architecture according to statistics.
Akismet: This allows you to block spam comments from your blog automatically.
WP Super Cache: It is a plugin that allows your blog to be opened much faster by creating a static HTML page of your website and showing this HTML page to incoming visitors.
AMP: It is a plugin that allows the articles you write on your blog to be read very easily on mobile devices (mobile phones, tablets). The compatibility of websites with mobile devices is one of the most critical issues for Google.
Contact Form 7: It is the most critical contact form plugin developed for WordPress and is straightforward. It allows you to add detailed or minimal contact forms to your website.
Customization: Many WordPress blog templates you will use will have customization fields for that template. Especially if you are using premium WordPress themes, you will have the chance to intervene in all website areas. If you are using a free template, the only place where you can customize your website is the View> Customize tab.
You can add a site icon in this area and assign your site’s slogan, background image, and color. Some themes use this area as a setting tab, and additional features come here.
Promote Your WordPress Website
All the areas we mentioned above were about WordPress blog setup and use. After this step, we will cover the promotion of our blog and how you can earn money from ads.
1. Take Place on Social Media
Before you started a WordPress blog, you used social media for your profile. This is an advantage for you because you can attract more visitors to your blog by sharing your blog posts on your social media profiles. Share your blog post on your social media profiles after each blog post you share.
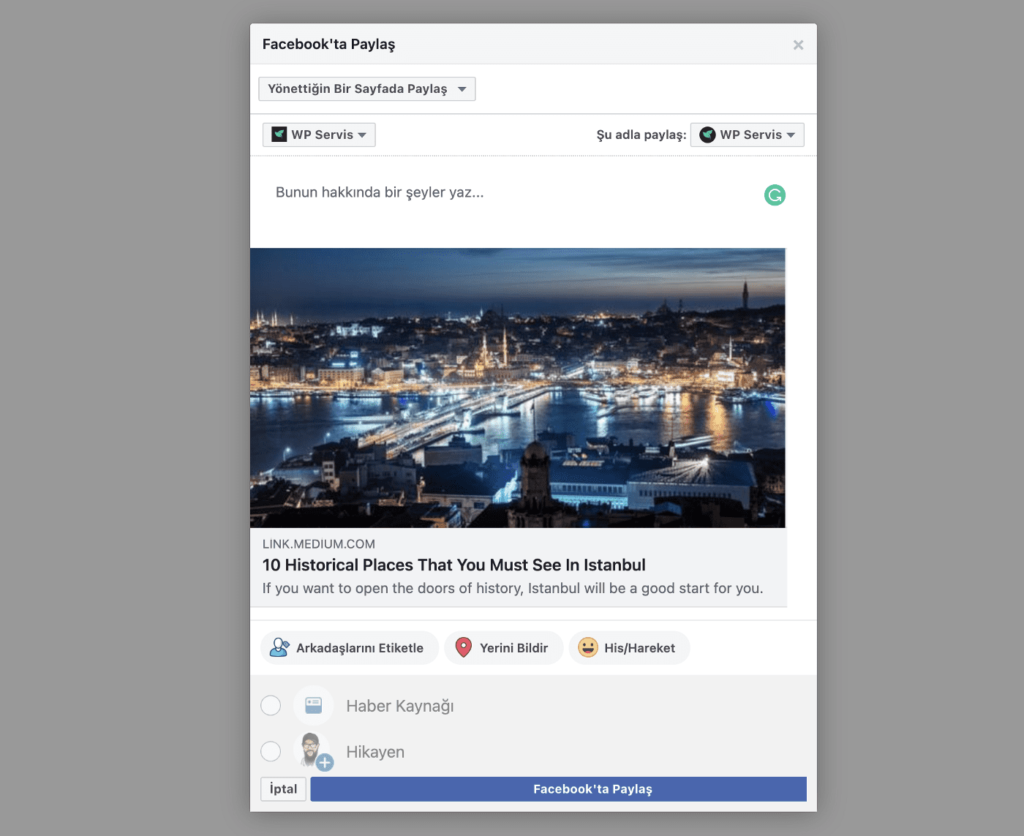
There are several ways to share blog posts. You can add a WordPress social media plugin to your blog. In this way, you can share with one click on the services in the social media sharing buttons that you will integrate into your posts. Or, you can copy the link of your blog post on your web browser and share it on services such as Facebook, Twitter, and Instagram.
- Copy the link
- Click the share button on your social media profile and paste the link
After waiting a short time, the system will automatically receive the image of your article and your connection. All you have to do is press the share button, that’s all.
2. Leave a Comment
It is one of the most used methods. Write comments about your blog posts or belonging to others that deal with topics related to either close to your blog. Be careful in your words not to offend people and spam comments which means writing the same comments all the time.
3. Promote in Dictionaries and Forums
You can promote your blog by leaving comments under the headings in some forums and dictionaries and by opening new topics on these sites without spamming. On the Internet, many platforms promote websites and blogs. You can contact these site owners and ask them to introduce your blog.
4. Organize an Event
One of the essential promotional methods of bloggers is to organize events. Give small gifts to your readers by organizing an event on social media. For example, I will give the book “….” as a gift to the person who shared the article most. This is a very effective method that people will help you reach different readers by sharing your blog on their social media profiles.
Earn Money From Your WordPress Website
After promoting our blog, it’s time to earn money. Yes, making money from your blog is possible after reaching a specific audience of readers and visitors. I have listed the most used methods for this below.
1. Google Adsense
Google Adsense is the most suitable platform for earning money from your blog. In this click-based system, you get a certain amount of profit from the ads clicked by your readers who visit your site. These revenues are automatically sent to your bank account, which you specified each month. Create your profile by opening an account through Google Adsense, then create your first ad and add it to your website. It is generally helpful to show Google ads in the right area of your blog. You can add your ad code from Google Adsense to your site from the View > Components tab.
2. Affiliate Programs
Affiliate marketing is a modern method in the world, especially in America. In short, the program works as follows;
- You create an account through an affiliate network (ShareASale, LinkShare, CJ, etc.)
- You identify advertisers related to your blog through this network and apply it to their programs.
- After the advertiser approves, you can add the company’s banners to your website or prepare a promotional letter.
- If your readers shop from these companies by clicking your reference link, you will earn up to a 5% commission from their shopping.
3. Online Store
Creating your online store with WordPress is very simple. Using the WooCommerce plugin, you can sell products on your blog and earn income. What you sell on your website is entirely up to you; maybe you can sell your old books, records, or second-hand items. You can get detailed information about the installation and use of WooCommerce by searching my blog.
4. Promotional Articles
Maybe not immediately, but in the future (as your blog becomes popular), some company owners may contact you and ask for a promotional letter. For example, your blog is a “recipe” blog, and some kitchenware manufacturers can contact you and request a promotional article on your blog; I recommend that you take advantage of such income opportunities.
Frequently Asked Questions for WordPress Website
Can I create a website site without WordPress?
You can create a blog without a WordPress infrastructure. You need to set up blogs on different infrastructures. Tumblr and Blogger are the most popular blogging platforms in the world. These two systems are alternative methods to WordPress, and you can consider these systems before you create a blog with WordPress.
Can I create a website without purchasing web hosting?
It’s not possible to create a blog without purchasing web hosting with wordpress.org. However, if you make a blog on WordPress.com (I explained the difference in the first step), you don’t need to buy a web hosting or domain.
Is it too expensive to create a WordPress website?
This issue is relative, so if you do not expect your blog (if there is no such thing as earning money in the future), you can create a blog for free. But if you want to make a small investment, you must pay at least $30 — $50 annually.
Can I write a blog in different languages?
Yes, it is possible to write blogs in different languages with WordPress. You can do this directly by typing in a foreign language or using the WordPress plugin.
I have explained all the points I have prepared for my readers who are just starting and want to have a WordPress blog. Please support me by sharing this article on your social media profiles, which I believe is a good guide.
Conclusion
If you want to access this article when needed, save it in your browser by pressing CTRL + D key. If you are still unsure how to start a WordPress website, let me know in the comments section.
Thank you very much for your time and reading. I hope you have found more detailed information about WordPress in this article.


